

Key Takeaways
- Begin with the everyday problems that make the bathroom less comfortable, safe, or easy to maintain.
- Keep a workable layout when possible, since relocating plumbing and electrical connections can expand the project.
- Choose finishes for moisture resistance, traction, cleaning needs, and long-term durability.
- Include practical features that can support changing household needs over time.
- Set priorities and complete work in the right order to avoid expensive changes after installation begins.
A bathroom update does not have to mean rebuilding the entire room. Targeted changes, such as better lighting, storage, fixtures, or bathtub replacements, can make daily routines feel easier without changing every surface or moving every pipe.
The best plans start with function rather than color trends. Before choosing tile, faucets, or mirrors, consider how the room functions during busy mornings, nighttime visits, bathing, cleaning, and shared use. A bathroom should support the people who use it now while allowing room for future needs.
Start With Daily Needs
Walk through the bathroom as if you were completing a normal routine. Notice where you reach, turn, bend, step, or wait for another person to finish. These moments reveal more than a showroom display ever can.
- Check whether shelves, towel bars, soap, and controls are easy to reach.
- Look for doors, drawers, and cabinets that block a walkway when opened.
- Identify corners that remain damp or collect clutter.
- Consider whether more than one person needs the room at the same time.
- Write down problems that create frustration every day, not just occasional inconveniences.
Inspect the Existing Space
Inspect the room before selecting finishes. Cosmetic updates cannot address loose flooring, damaged caulk, slow leaks, cracked surrounds, or moisture affecting the wall or floor behind a fixture. Finding those concerns early makes it easier to define the real project scope.
A simple inspection checklist includes checking for soft spots near the toilet or tub, staining below plumbing connections, loose fixtures, deteriorated grout or sealant, peeling paint, and an exhaust fan that does not seem to move moisture out of the room. If you find signs of active leakage, electrical concerns, or structural damage, arrange for an appropriate qualified professional to evaluate them before covering the area.
Choose Between a Refresh and a Renovation
A refresh focuses on visible and functional improvements while leaving the room's basic systems and layout intact. It may include paint, lighting, hardware, a vanity, updated storage, a new mirror, or selected fixtures. A larger renovation becomes more appropriate when the project involves waterproofing, hidden damage, major plumbing or electrical work, or a layout that no longer serves the household.
- Keep the existing layout if it provides enough space and works well for daily routines.
- Repair concealed damage before installing new finishes over it.
- Use a broader plan when several systems need attention at once.
- Confirm local requirements and use qualified trades for work that requires specialized expertise.
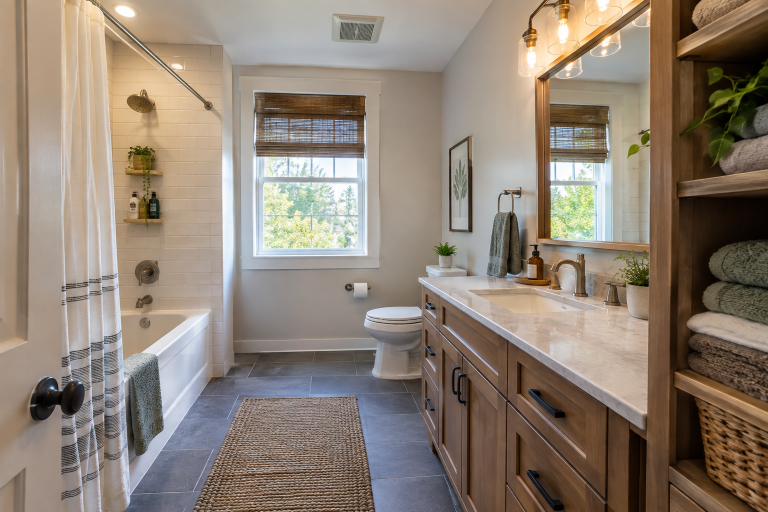
Improve Bathroom Safety
Safety features can make the room more comfortable for people of many ages and abilities. Prioritize clear walking paths, stable footing, good visibility, reachable storage, and reliable support near places where people sit, stand, turn, or step over an edge. A bathroom fall-prevention checklist can also help homeowners identify simple changes that fit their routines.
- Choose flooring and bath surfaces that offer traction when wet.
- Install grab bars with suitable wall support rather than relying on towel bars.
- Consider a handheld showerhead or stable bathing seat when it suits the user and the bathing area.
- Keep towels, toiletries, and controls within easy reach.
- Remove loose mats and keep clutter away from entrances and walking paths.
Plan the Layout Before Buying Materials
Measurements should guide every purchase. Record the room dimensions, door swing, window locations, fixture sizes, and clear space needed to move around comfortably. Then mark plumbing points, switches, outlets, vents, and any walls that may limit changes.
A basic floor plan can prevent common mistakes, such as a vanity drawer that conflicts with the bathroom door or a mirror that is too narrow for the sink below it. It also helps you compare options before committing to a fixture that looks appealing but does not fit the space.
Select Durable, Easy-Care Materials
Bathroom materials should be judged by both performance and appearance. Consider how a surface handles water, soap residue, cleaning products, foot traffic, and normal wear. Detailed tile patterns can create visual interest, but more grout lines may also mean more routine cleaning and maintenance.
- Select flooring with dependable wet-area traction.
- Use smooth, sealed surfaces where soap and water are frequently collected.
- Review grout color and upkeep before choosing small-format tile.
- Keep finished samples together to compare color and texture under the room's actual lighting.
- Coordinate fixture finishes so replacements and accessories look intentional.
Make Lighting and Ventilation Work Harder
Layered lighting supports grooming, cleaning, and safe movement. Use even general lighting for the room, task lighting around the mirror, and low-level lighting for nighttime trips if needed. Good lighting should reduce harsh shadows around the face and help reveal wet spots or changes in floor level.
Ventilation deserves the same attention as finishes because moisture can affect paint, caulk, and surrounding materials. The EPA's indoor air quality guidance explains why managing moisture and pollutants indoors matters. Make sure the fan, vent path, and controls are addressed in the plan rather than treated as an afterthought.
Build a Realistic Budget
Costs depend on the room's condition, local labor, materials, and project scope. Account for demolition, surface preparation, plumbing, electrical work, fixtures, finishes, permits where required, disposal, and repairs discovered behind walls or beneath flooring.
- Must-have work: Leaks, damaged surfaces, safety repairs, and required system updates.
- Daily-use upgrades: Storage, lighting, ventilation, accessible controls, and comfort features.
- Style choices: Decorative tile, upgraded hardware, statement mirrors, and accent details.
Keep a contingency amount for hidden conditions, delayed materials, or necessary changes discovered during demolition.
Organize the Project in the Right Order
- List current problems and desired improvements.
- Measure the room and document existing conditions.
- Set priorities and establish a working budget.
- Confirm permits, inspections, and trade needs where applicable.
- Select major fixtures and materials before construction begins.
- Complete demolition and inspect concealed areas.
- Finish structural, plumbing, electrical, and waterproofing work.
- Install finishes, fixtures, lighting, and accessories.
- Test drainage, water flow, lighting, ventilation, and safety features.
Conclusion
A successful bathroom update solves real daily problems before it focuses on decorative details. By inspecting the room, setting clear priorities, choosing durable materials, and following a logical project order, homeowners can create a bathroom that is safer, easier to clean, and more comfortable for years to come.
Most read in News
Trending articles on News
Top articles on Minutehack


 Share article via email
Practical Guide To Planning Bathroom Updates That Improve Daily Use
Thanks for signing up to Minutehack alerts.
Brilliant editorials heading your way soon.
Okay, Thanks!